Phoboxi
Responsive Photography Theme
Responsive Photography Theme

Version 1.0
Thanks so much for purchasing our Theme. It's our pleasure of making your choice. We hope that you would enjoy it!
To download the Phoboxi theme, please log in your ThemeForest account and then go to ThemeForest download page. Locate to Phoboxi theme and then download the installable WordPress file only
How to install Phoboxi Theme.
Before starting to install and work with the Phoboxi theme, you firstly install WordPress latest version on a server. There are 2 ways of installing your theme into your website.
2. WordPress Upload. Let the Phoboxi theme file still zipped to be upload directly into WordPress. The followings're step-by-step guide you how to install your theme.
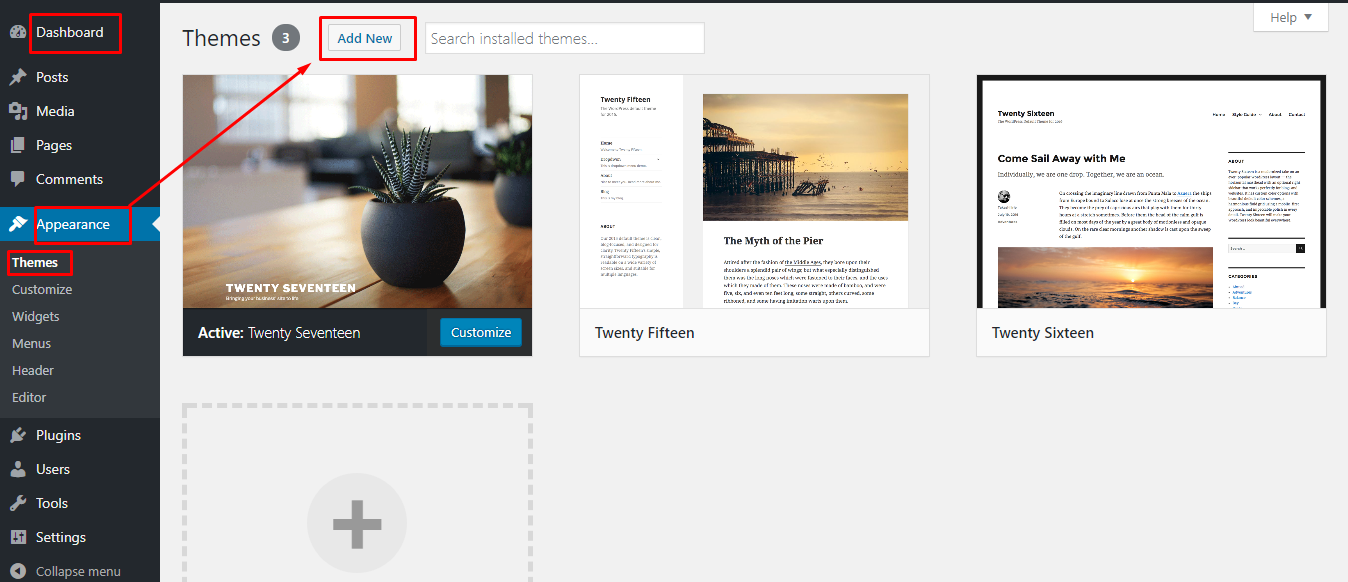
Step 1: Go to Appearance -> Themes then click the "Add New" button and then select "Upload theme"
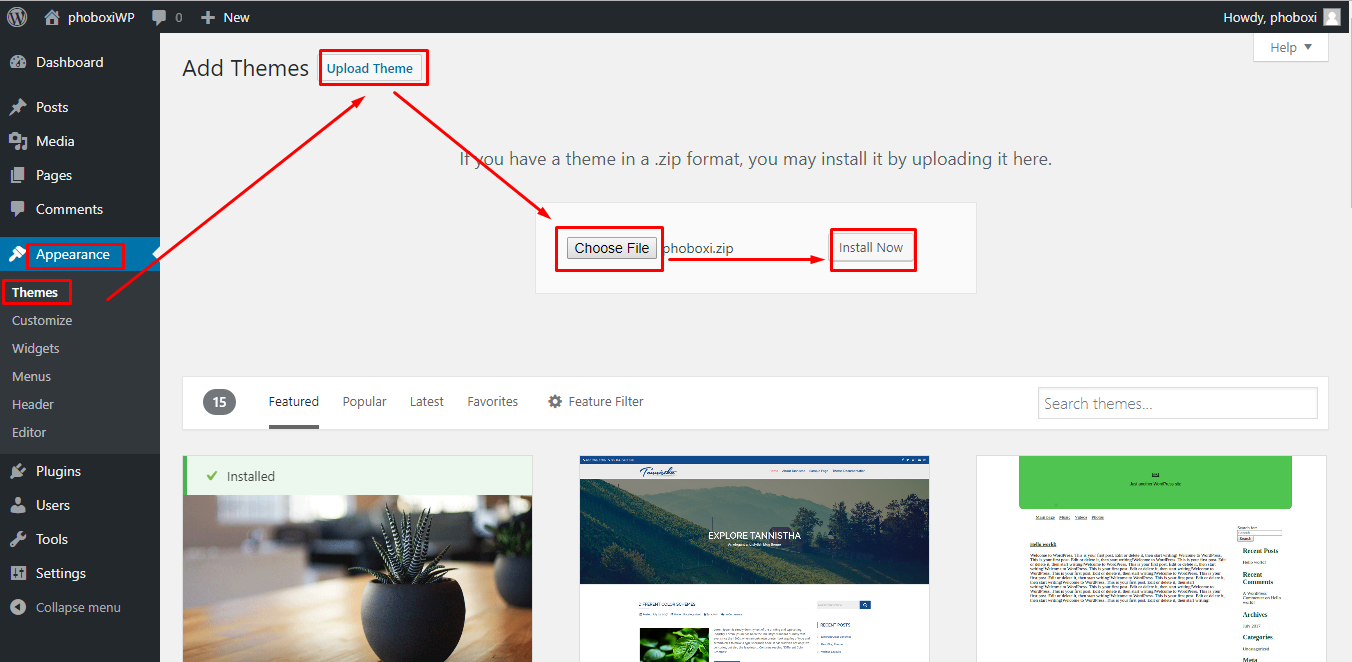
Step 2: Click "upload theme" button then appear the "Choose file" dialog, next browse to the Phoboxi theme file you downloaded before, then click the "Install Now" button
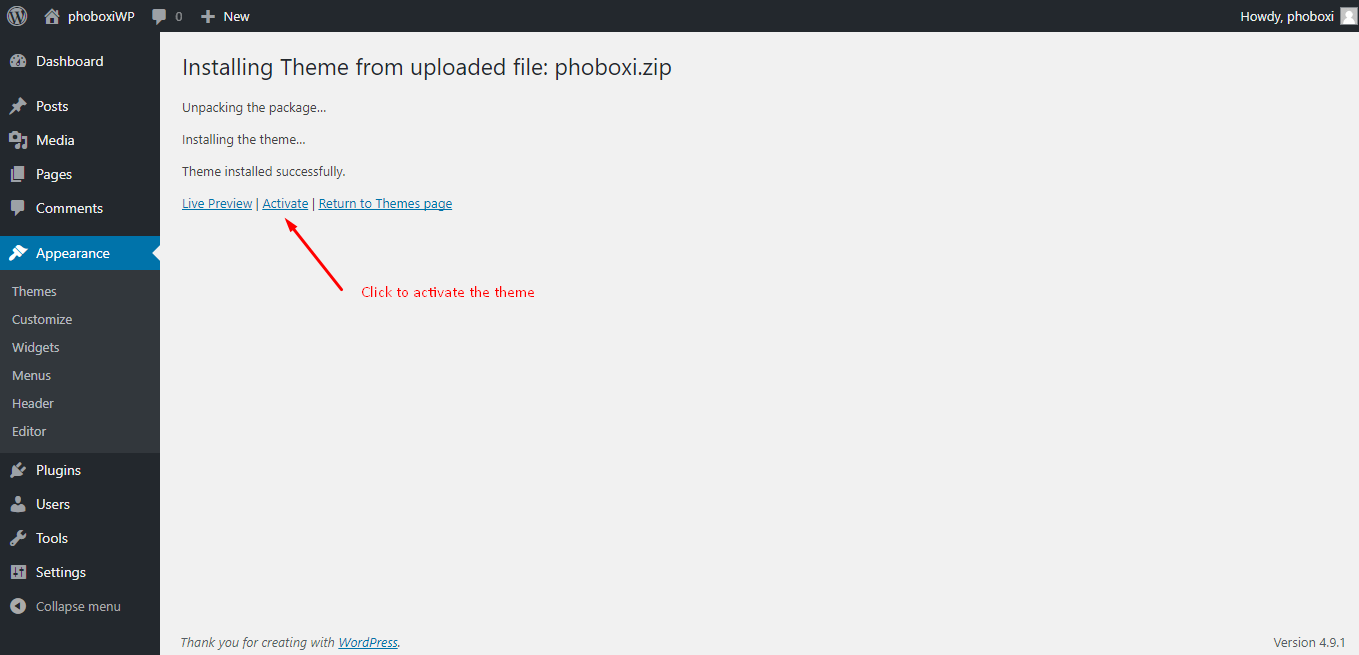
Step 3: After the installation progress has been completed, click "Active" button to active our Phoboxi theme.
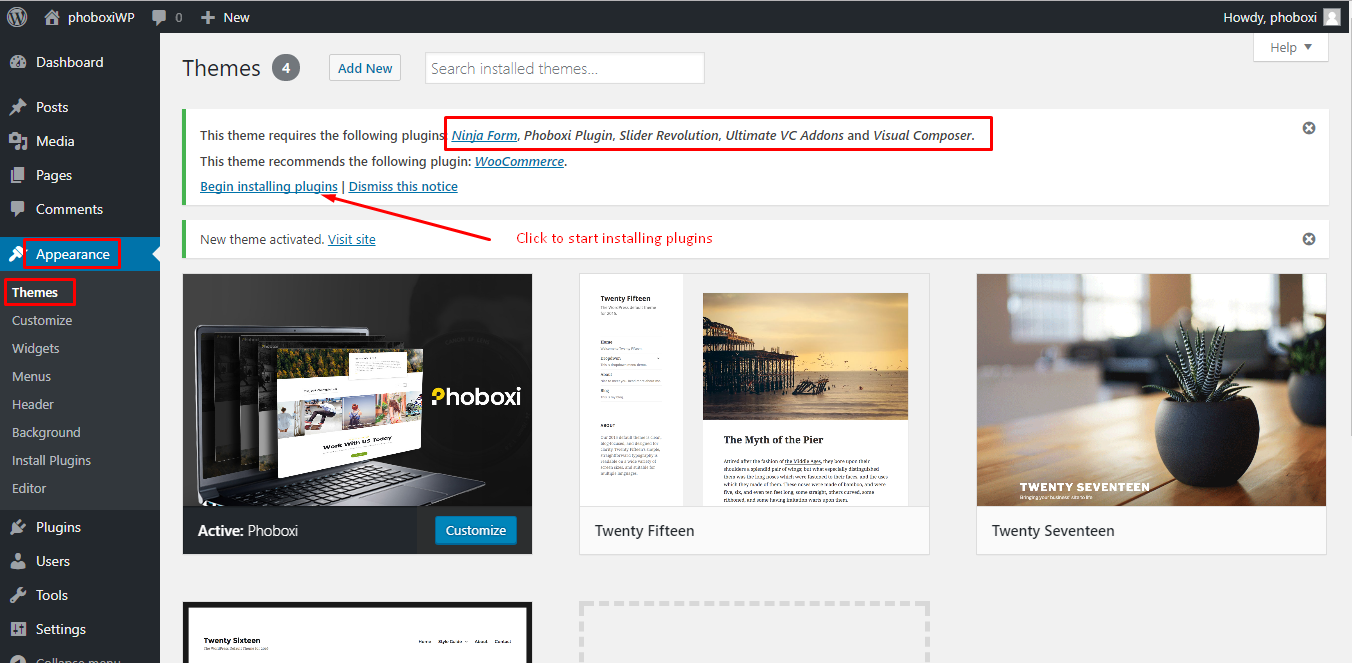
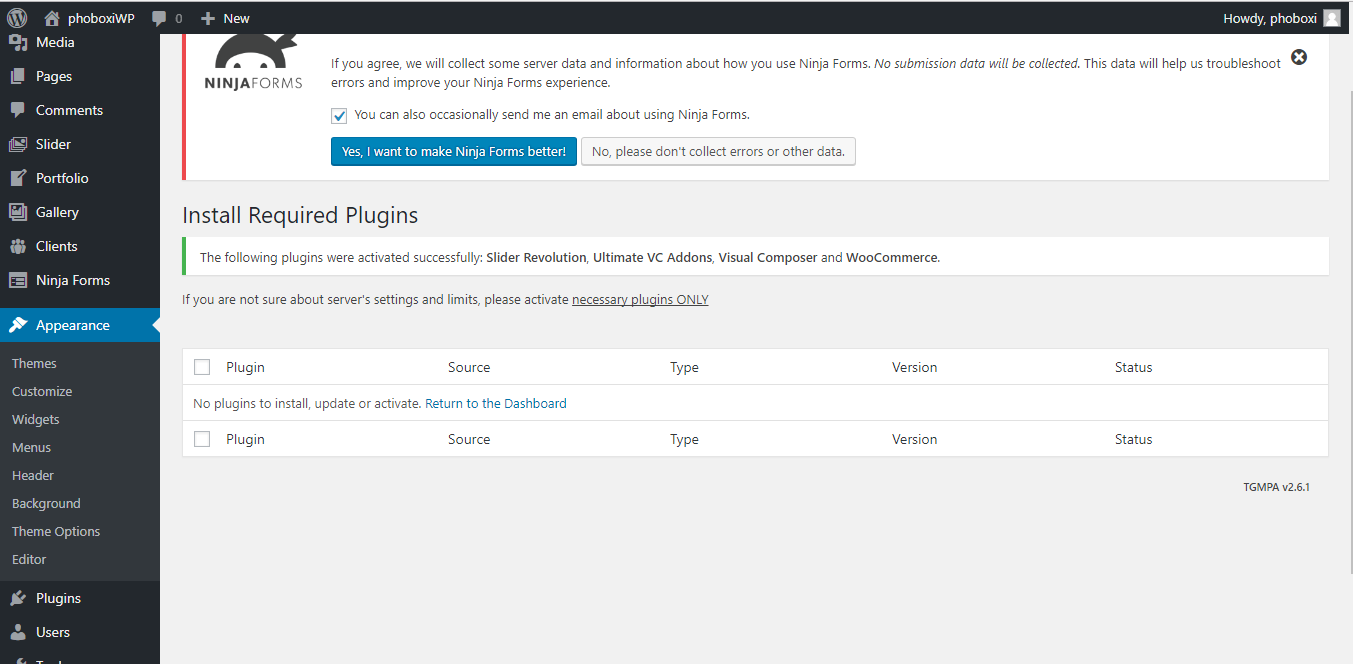
Once you have activated the Phoboxi theme, there would be a notice above recommends that you need to install some required and recommended plugins. Just click the link to begin activating plugins.
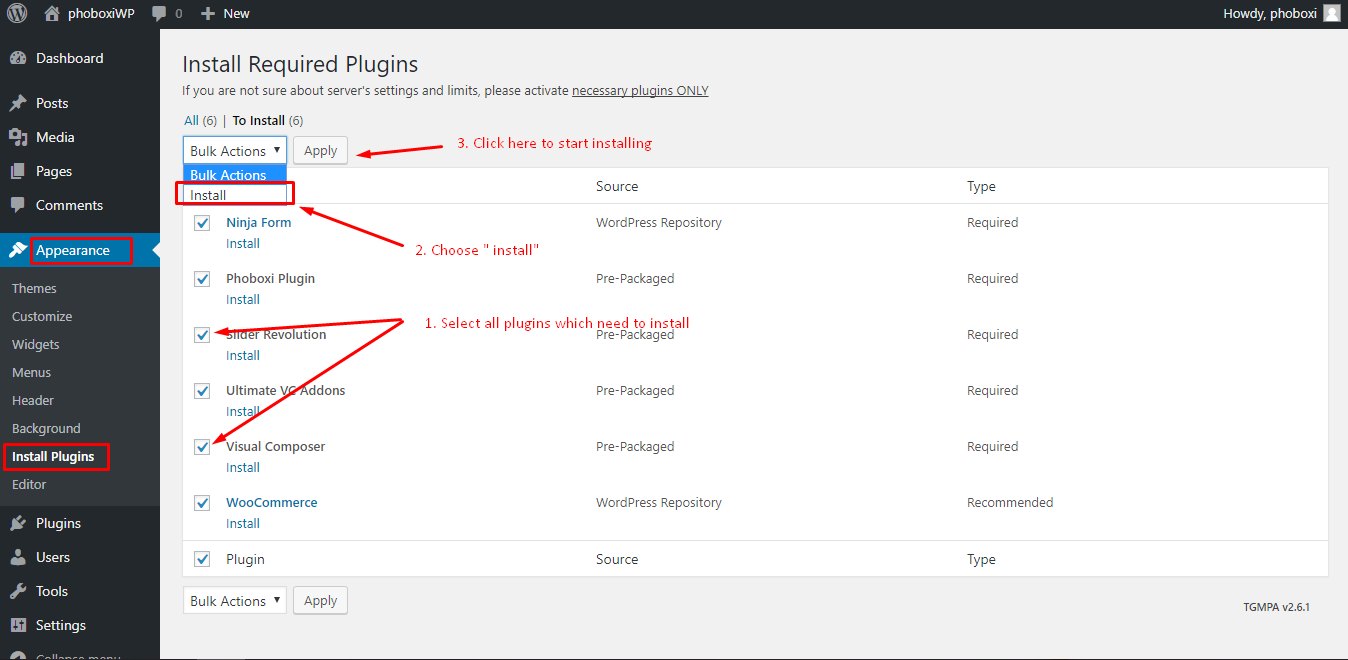
Next, check the first box name "plugin" to select all the plugins which were recommended to be installed uncheck the plugin that you don't want to have on your theme, select the action "install" from the dropdown list box and then click the "apply" button.
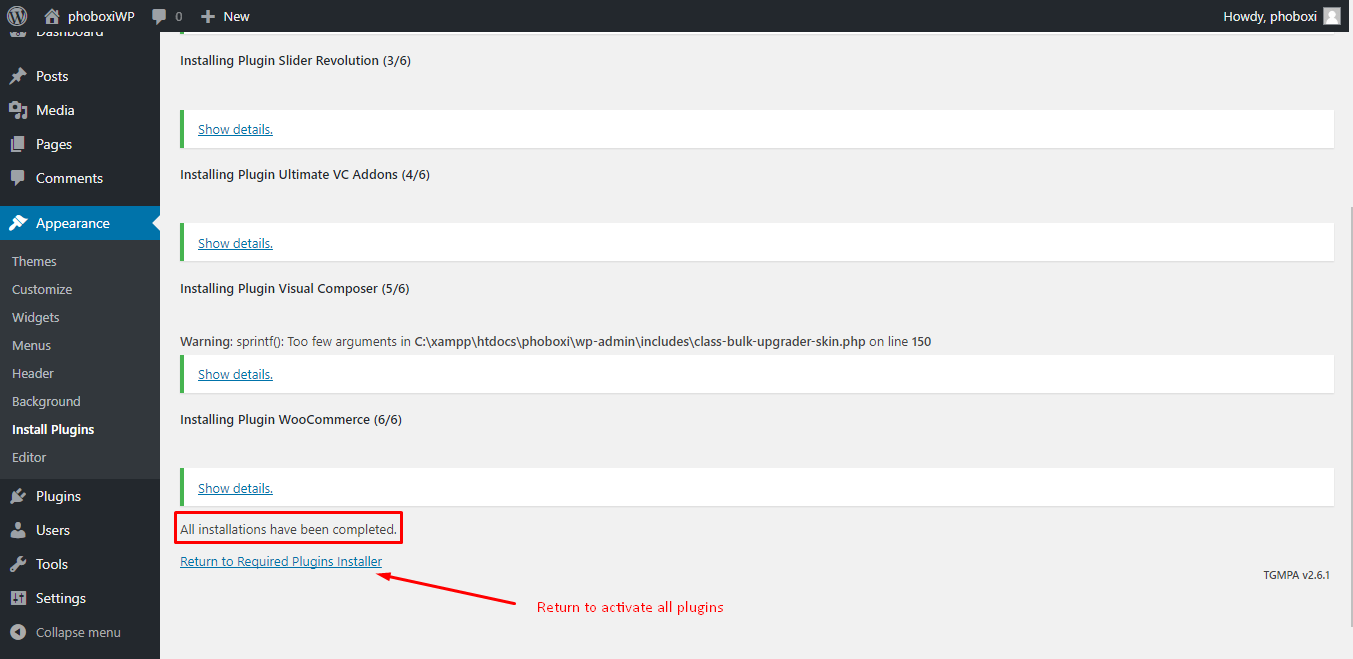
Select all the plugins you had installed, and then apply the action "activate".
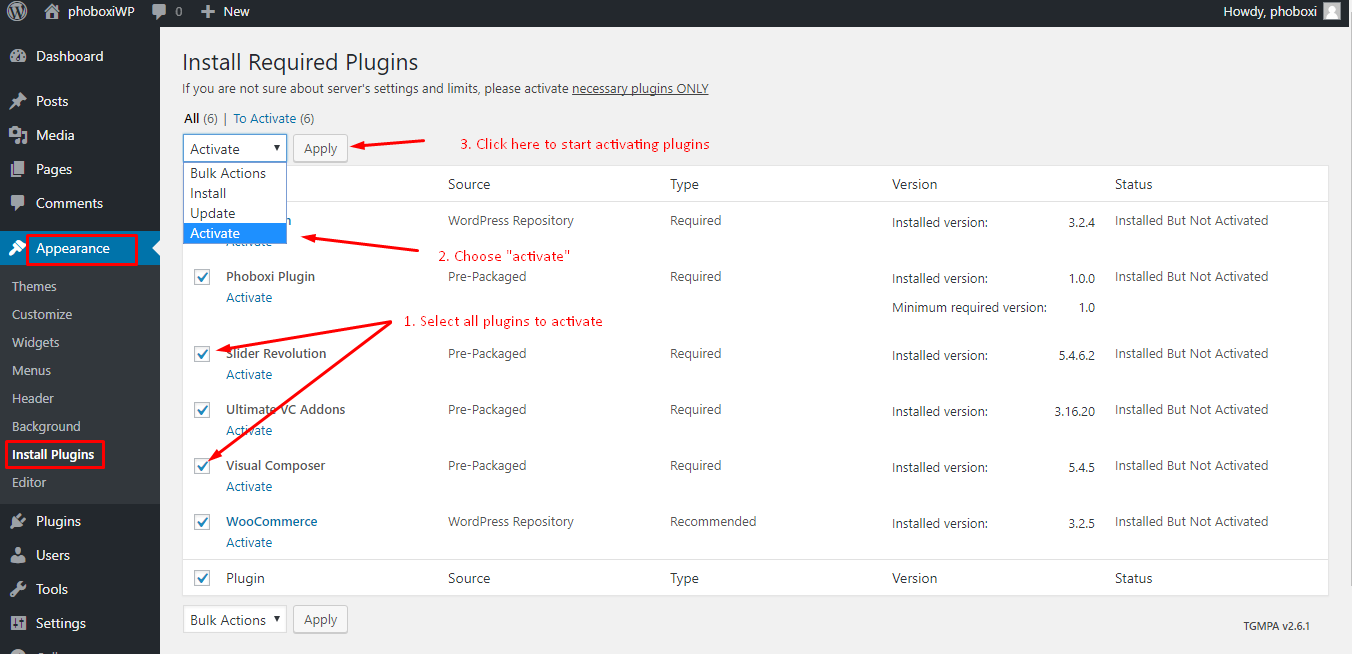
Finally, you will get a confirmation notice that your plugins were activated.
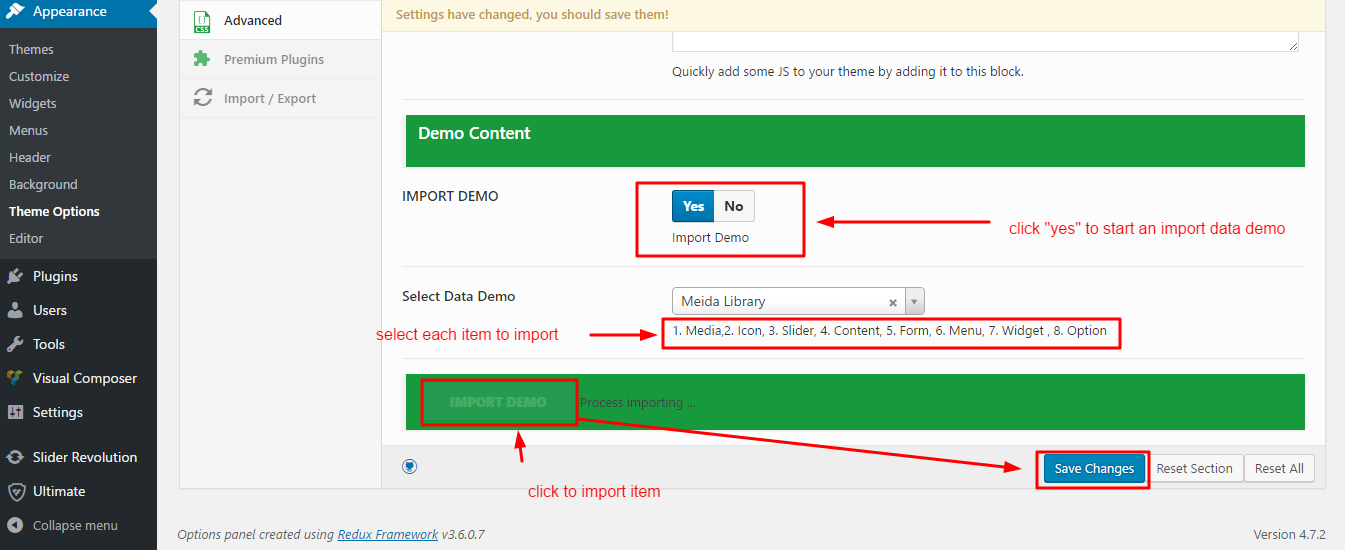
You can easily have your theme content with just one click importing the demo data which had been already prepared for the Phoboxi theme.
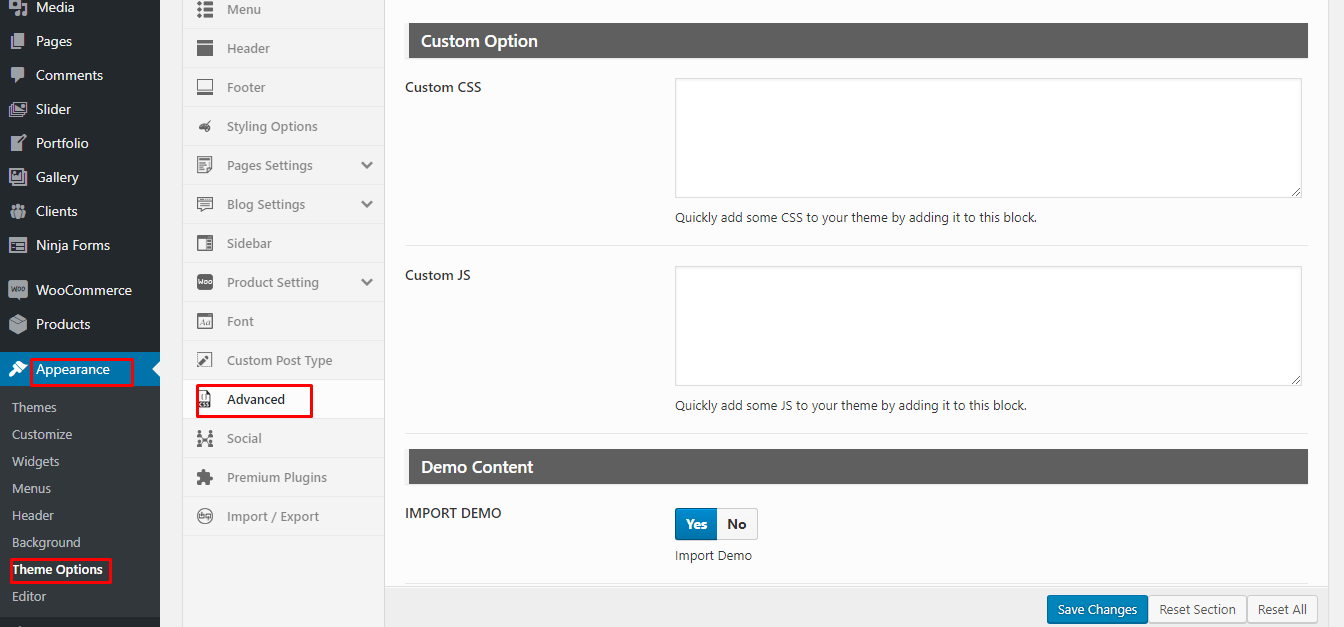
Step 1: Go to Appearance > Theme Options > Advanced > Demo content > Import Demo, click "Yes" to start an import data demo.
Step 2: Select Data Demo: Choose each Item and then Click button "Import Demo" and wait for seconds until the process done.
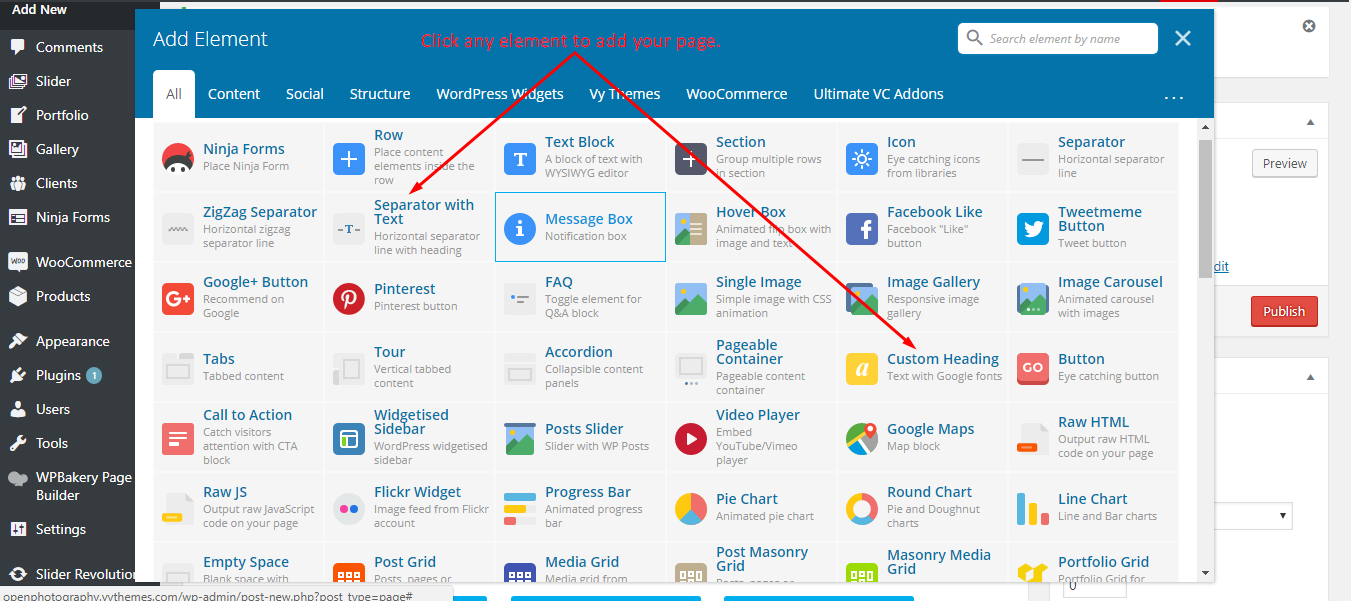
Step 1: Navigate to Appearance > Menus, then enter your menu name and click to the "Create Menu" button. Step 2: This plugin is packaged with compilation of some addons, helps you to build any layout you can imagine with intuitive drag and drop editor – no programming knowledge required. Learn more detailed information and support of this plugin at: https://vc.wpbakery.com/ WooCommerce is a powerful, extendable and free eCommerce plugin that helps you to sell anything, beautifully! For more detailed information and support on this plugin, please link to: https://wordpress.org/plugins/woocommerce/ WPML makes it easy to build multilingual sites and run them. Phoboxi theme includes support for the Visual Composer plugin. Visual Composer comes with a lot of drag and drop modules to help you quickly and easily building your pages. Step 1: Go to Pages > click "Add new" and then enter your page information. You can create your page content with CLASSIC MODE or if you would like to create a complex page with page builder, click to "Backend Editor" to use Visual Composer plugin building your page. Step 2: Add elements on page, drag and drop to manage its position and edit its content.
Click on "Publish" to save and publish your new page or "Save draft" to save it as a draft.
Here is how it works on our page
Navigation
Create new navigation
Visual Composer plugin
WooCommerce Plugin
WPML Plugin
Pages
List of builder items ( included buider items build special for this theme )

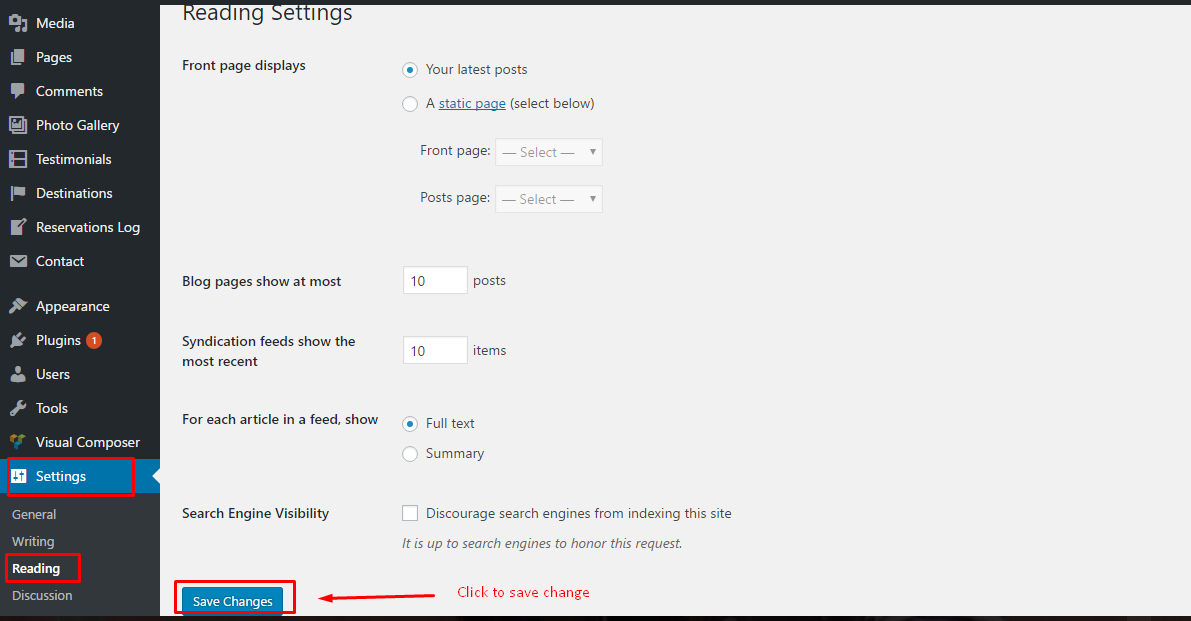
Go to Settings > Reading and select which page you would like to be your font-page and blog page
Slider Revolution is an innovative, responsive WordPress Slider Plugin that displays your content the beautiful way.
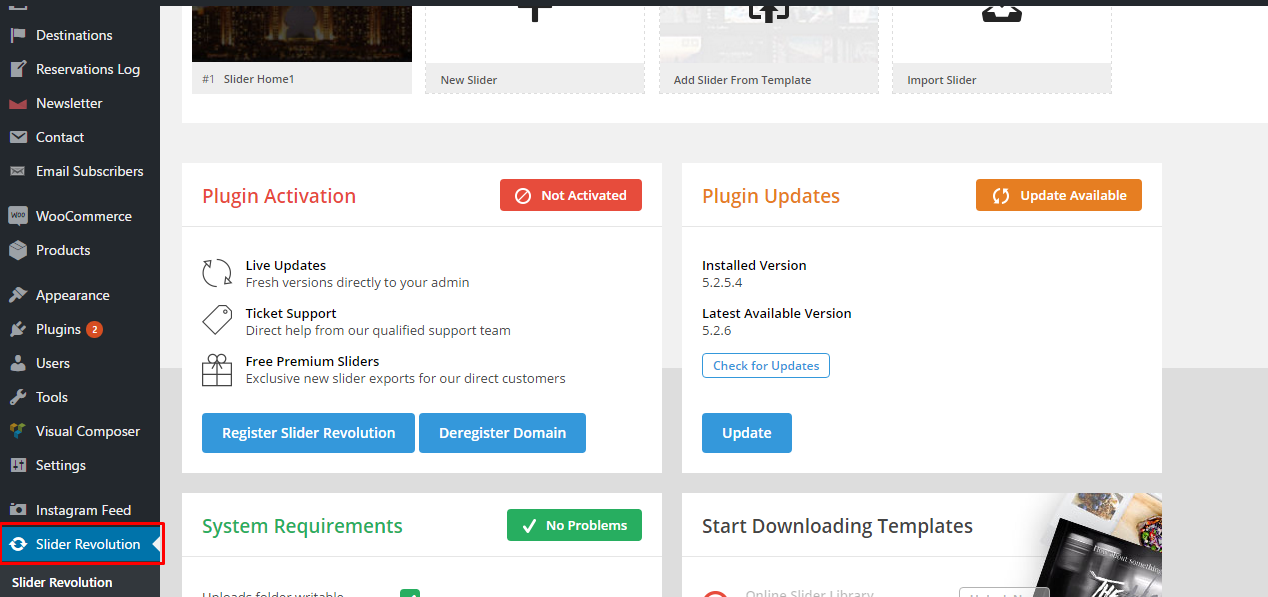
Import Slider Revolution:
In order to import Revolution Slider, go to appearence > Theme option > advanced > demo content. You can select " slider" item and then click " import demo" button to start importing slider demo.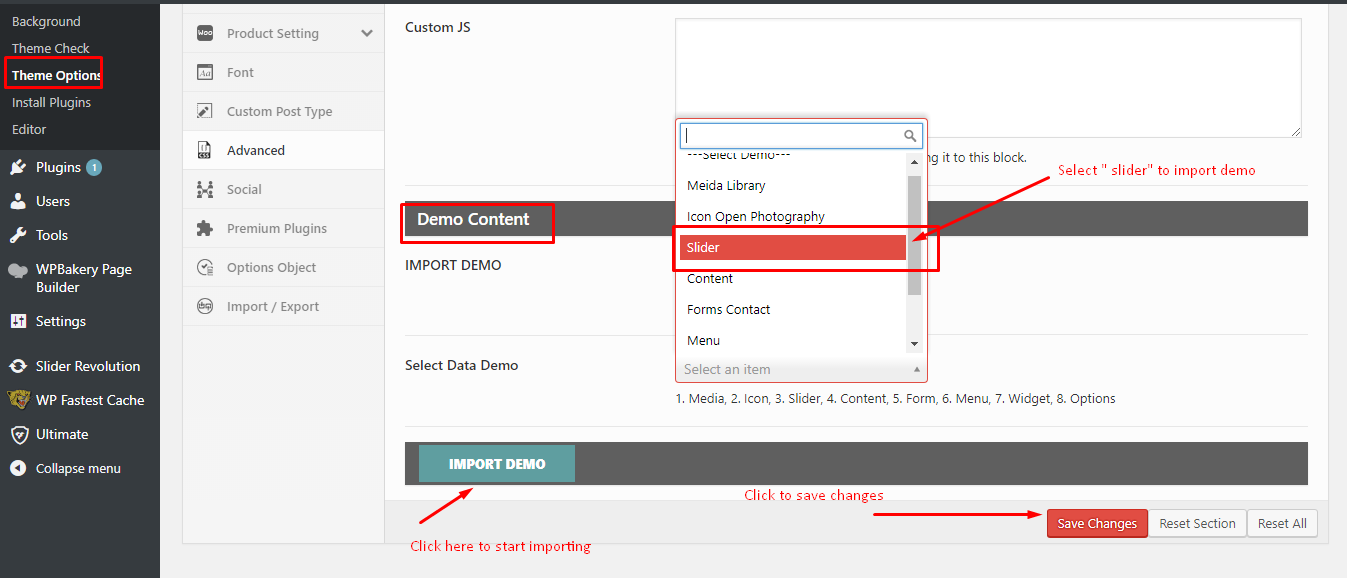
This theme come with Revolution Slider licensed, in order to understand how the slider works and how to work with it, I prefer you read it's documentation live at http://revolution.themepunch.com/documentation/
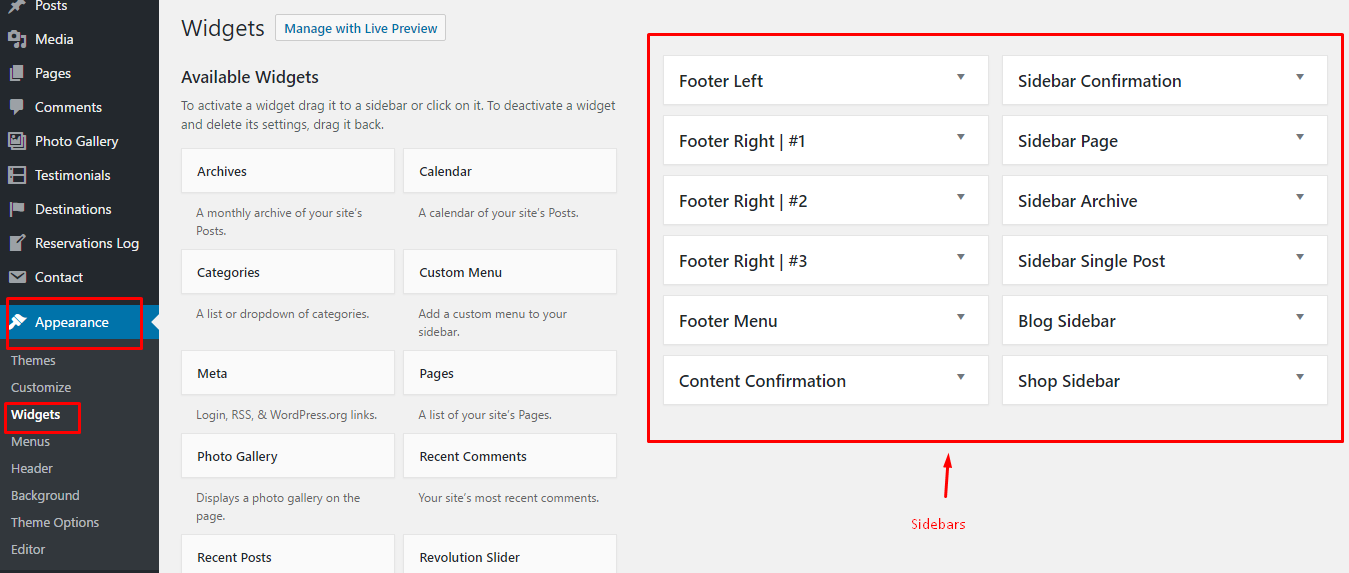
The theme comes with 16 sidebars:
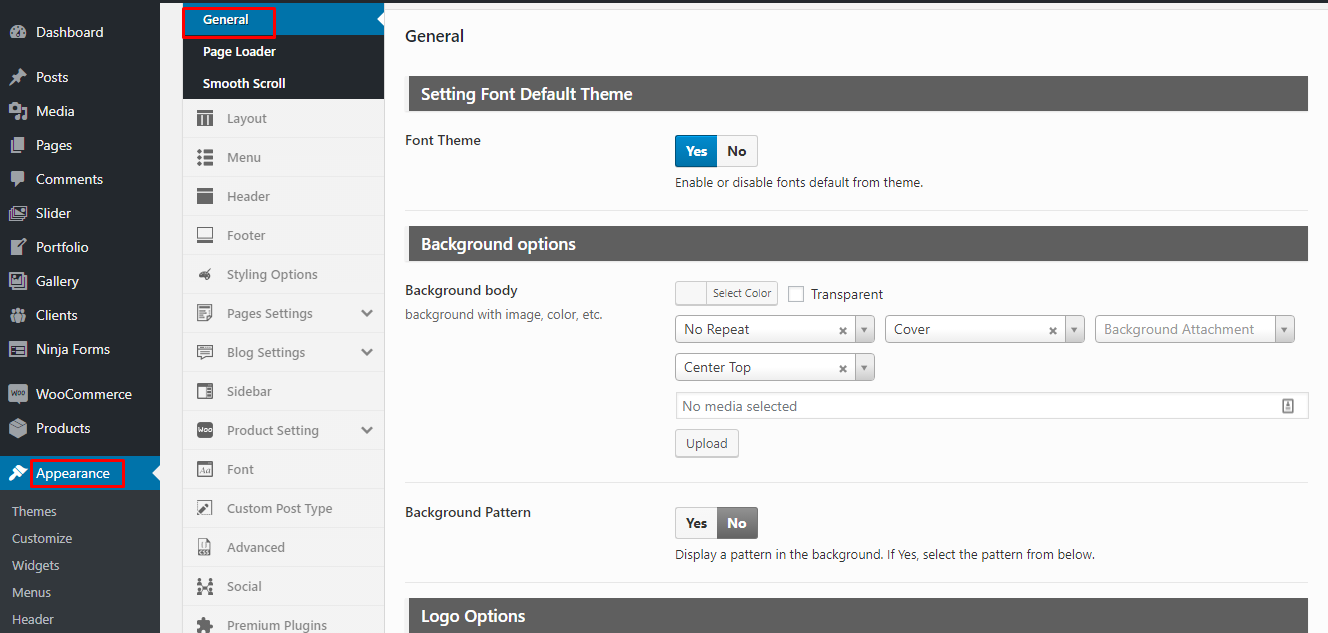
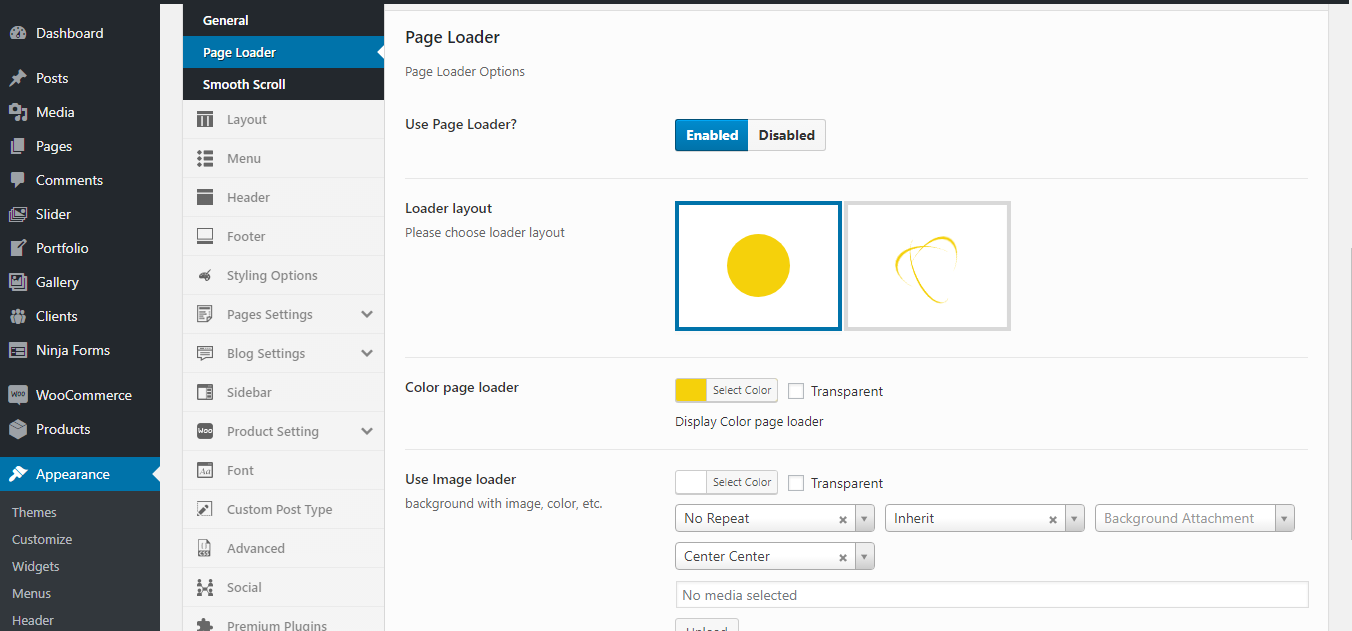
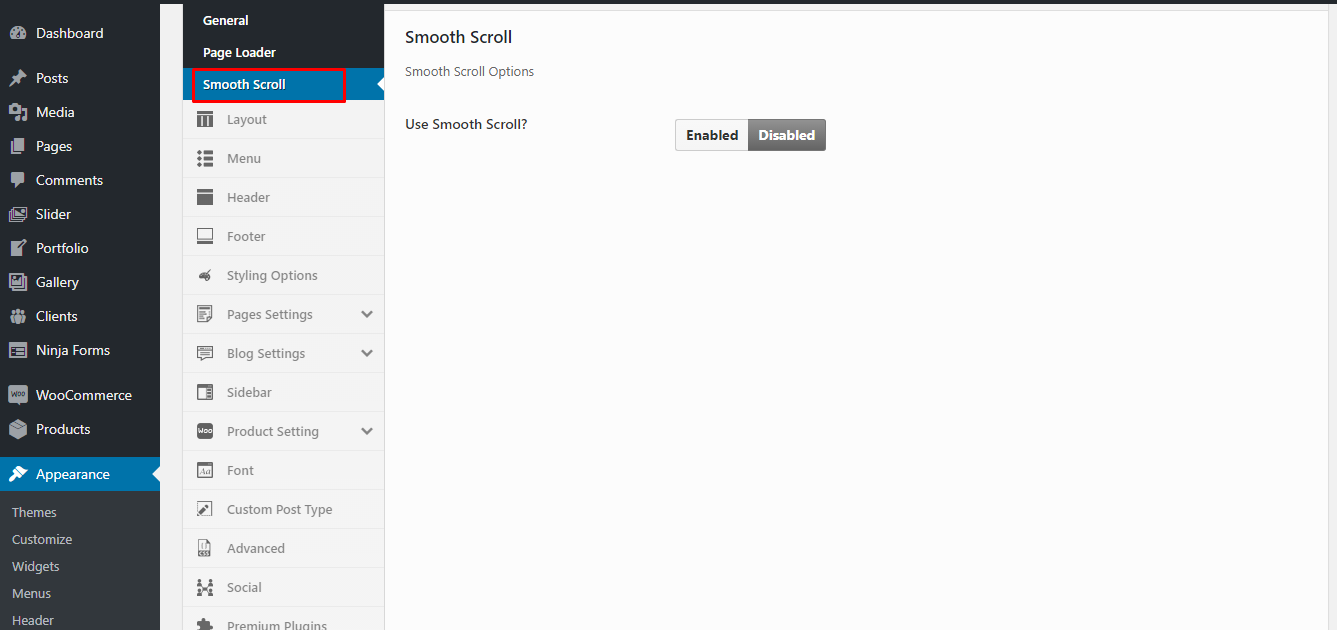
The Phoboxi theme options panel is home to all of the theme's extensive configuration options, which helps you to custom all parts of your website theme.
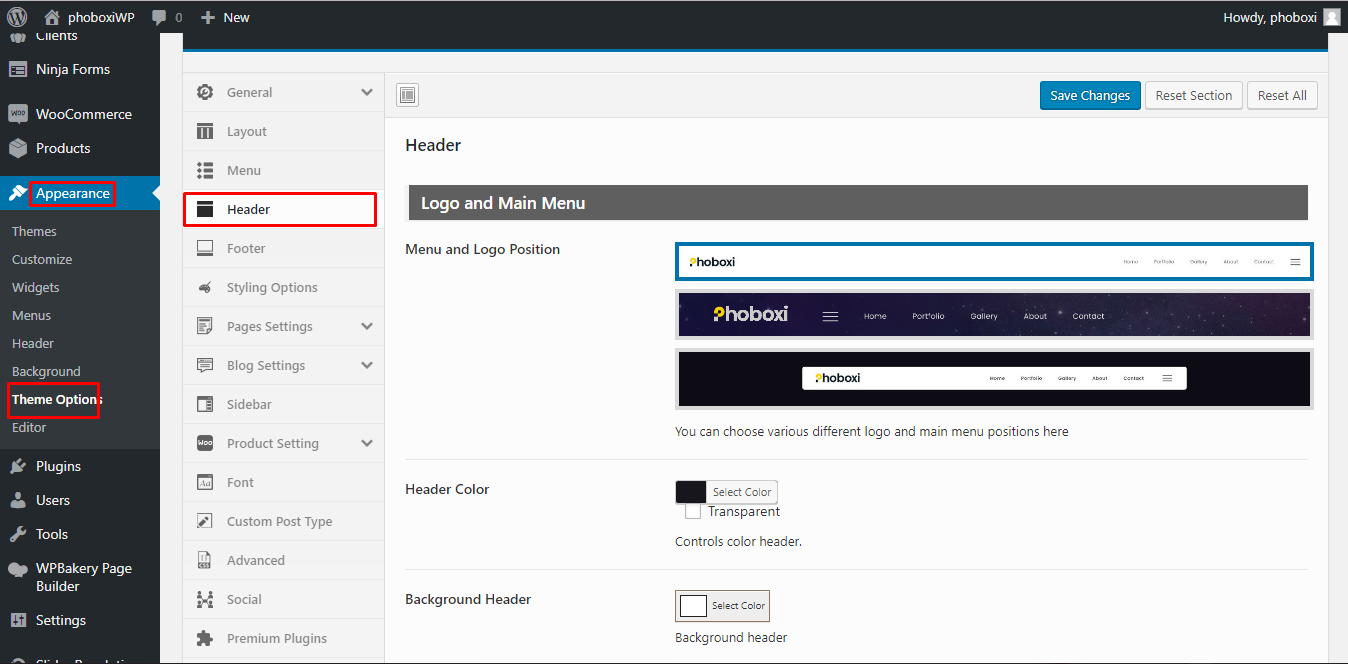
To view the panel, click the Theme Options in the left-hand menu. You will have the ability to custom many core aspects that make up your theme apperance and work.
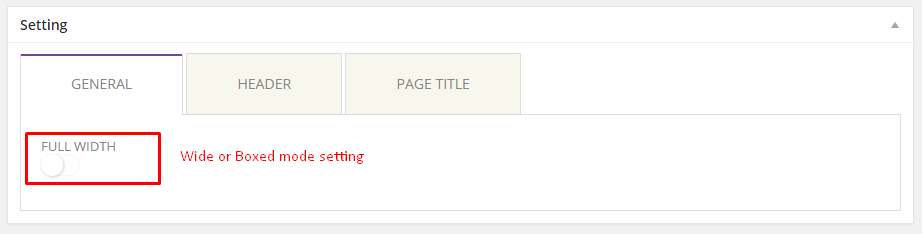
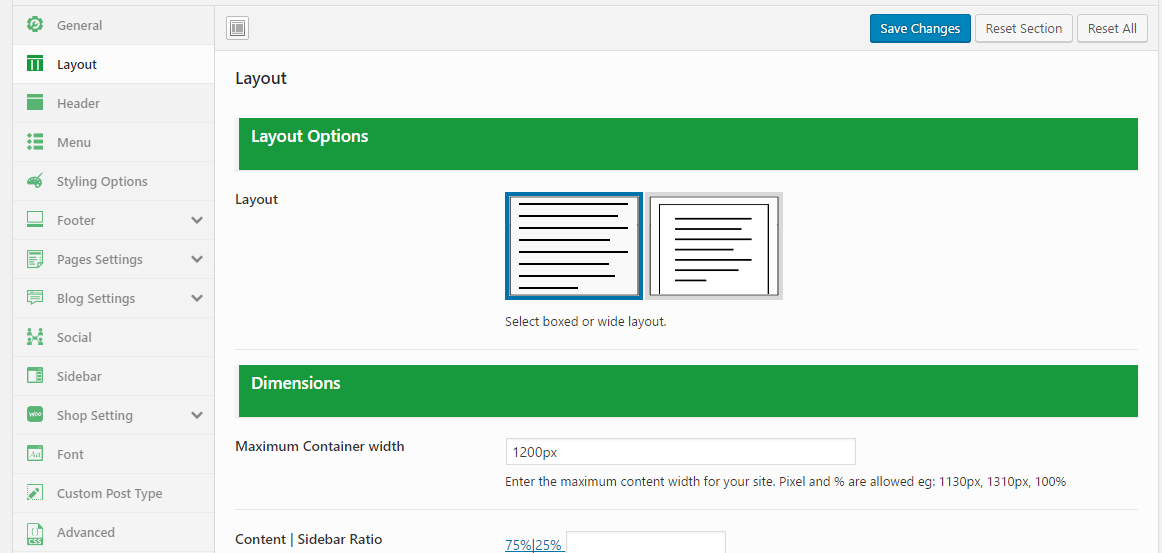
Layout: you have two ways to layout your site, the first one is layout full width content, another one is layout box in which content will be narrowed in a frame.
Dimensions: Choose the maximum content width for your site, it is counted by pixel or percentage. You can also choose content – sidebar ratio where display the width of content sidebar. The first number defines the content width and the others define the sidebar width.
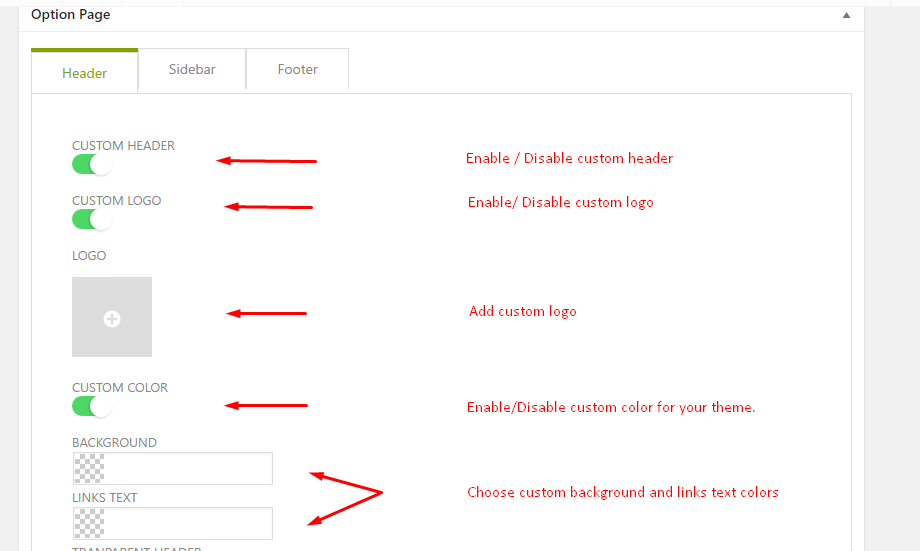
Main Menu and Top Bar: In the menu header, you might allow uppercase case display or not, set transparent header or not, custom header background color by your own, or custom transparent header displayed where minimum and maximum value is 0 and 100 respectively; it means that if you set 100%, transparent header color will be the same at color you set before, and if you decrease percentage, transparent header will be fader. In this section, you even can put phone number, cart to shopping, search bar and social icon link to your social page.
Sticky Header Options where you can enable sticky display when scroll down; background, color, opacity and logo was also set in this section.
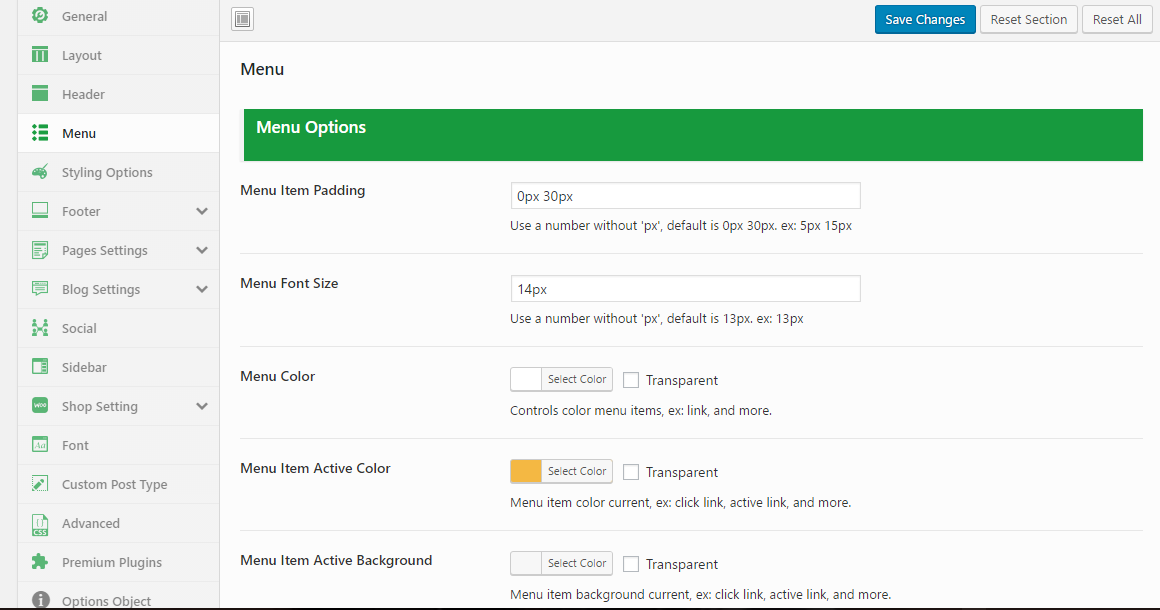
Menu Options: all font size, color of menu items, menu when hover, sub menu, background was included in this Menu Options part.
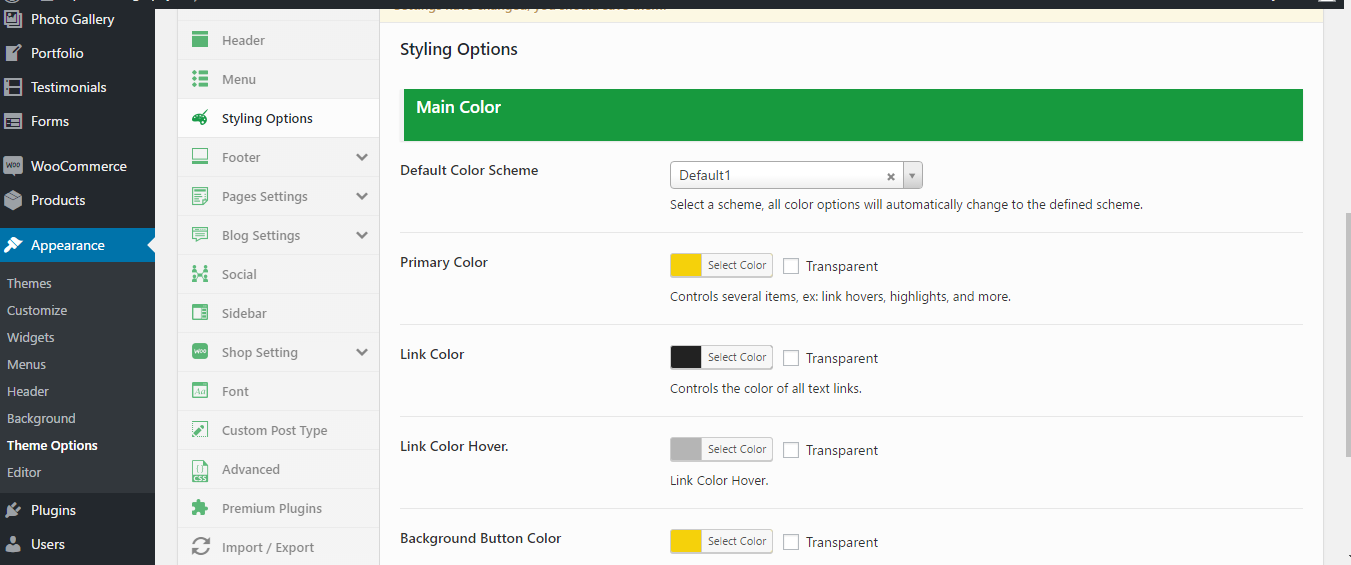
Styling Options: this section will decide what color is main color of your site related to link color, link hover color, background button color, etc.
Footer: Where you can allow to display footer widget and footer socket or not; you can set number of column display, copyright of your site, colors such as footer color, footer headings color, footer link color, footer link color when hover, footer background position.

Page setting: this section allow to show comments for this page or not.
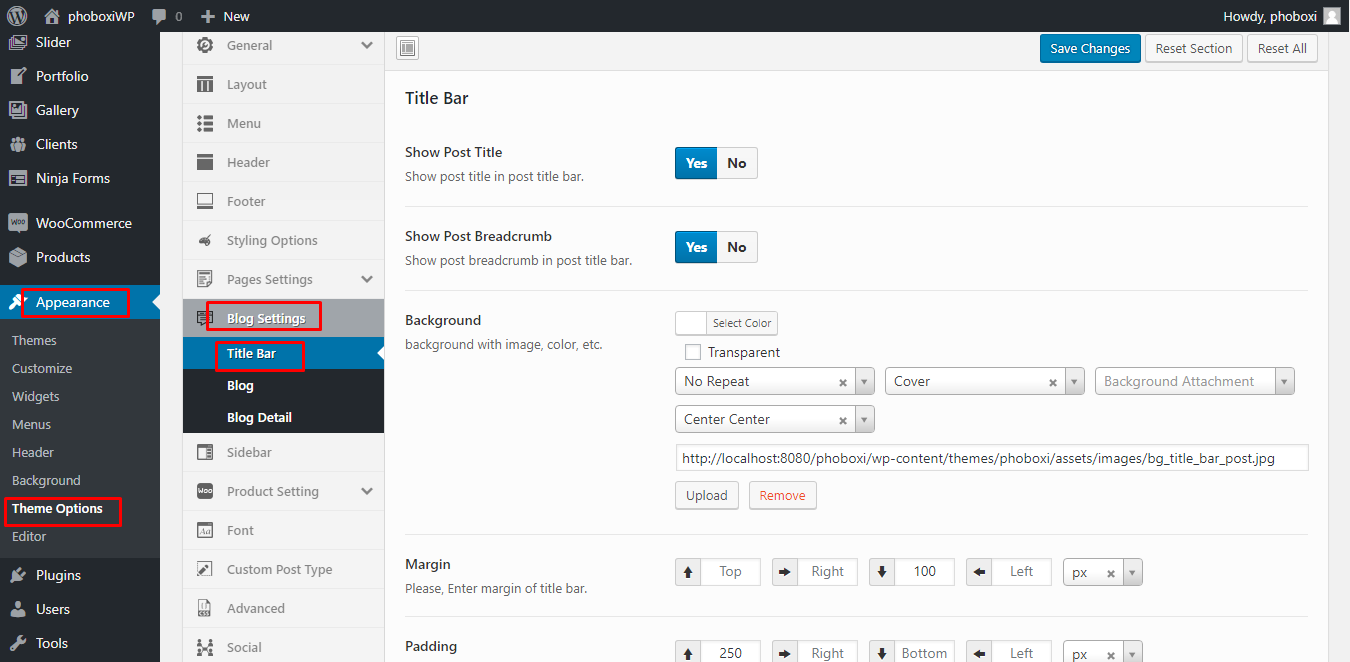
Also, in the Title Bar section, this is shown to setting page title, page breadcrumb, color or image of background of this page, top-bottom-left-right margin and padding of title bar, last one is delimiter breaking between the menu title and submenu title.

Blog setting: All in this part will support to build your blog page, it is similar to Page Setting section.
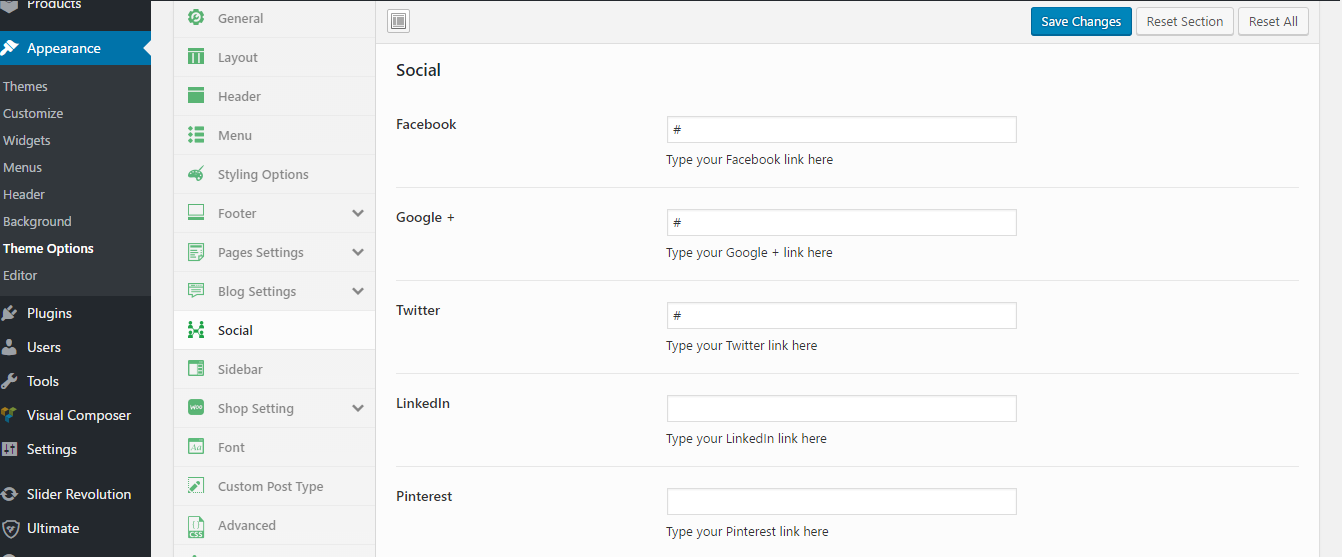
Social: All in here will be set your social link to your social page such as Facebook, Google +, Twitter, LinkedIn, Pinterest, Instagram, Vimeo.
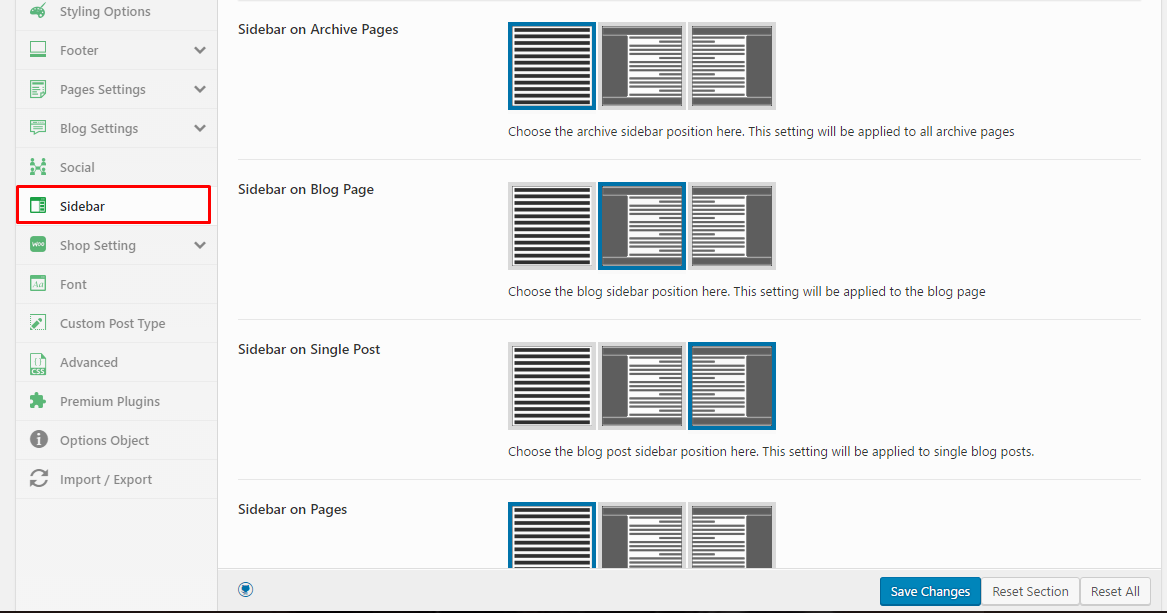
Sidebar: you can choose sidebar position (left, right or default) for Archive Pages, Blog Page, Single Post or Pages at here.
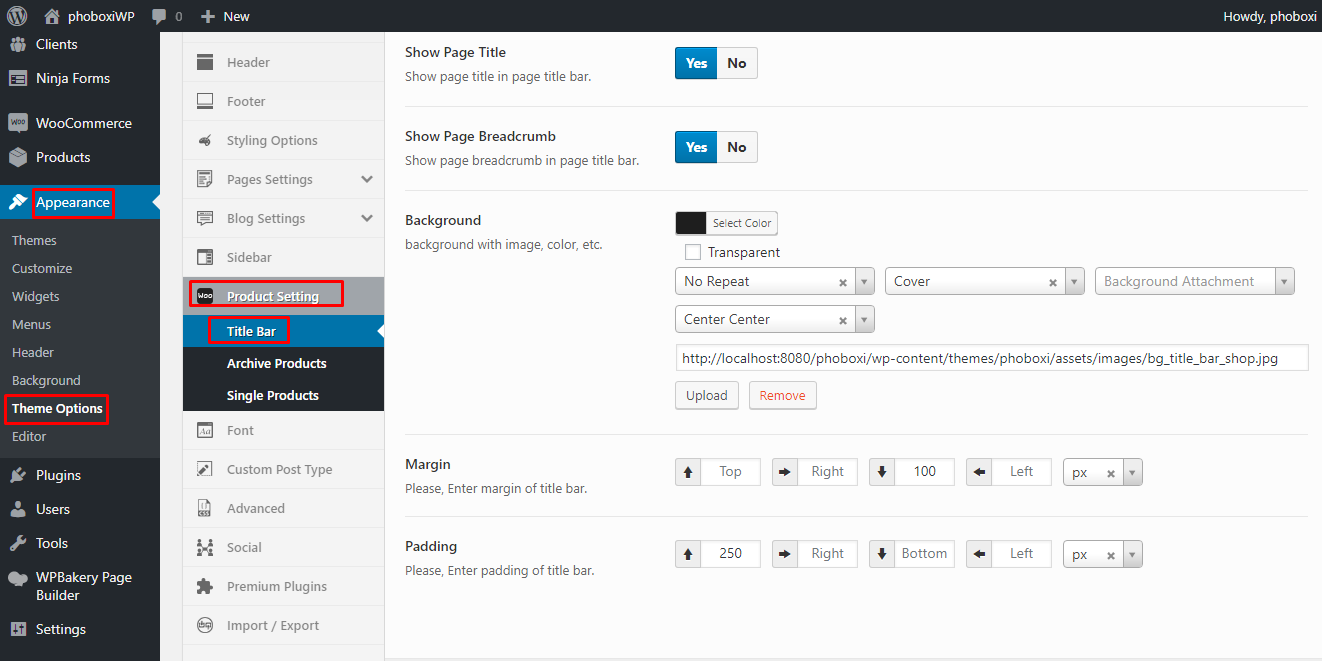
Product Setting: this Title Bar section is also setting similar as Page Setting.
In the Archive Product and Single Products: you can set all the features related to your product such as title, description, price, layout to display the products…


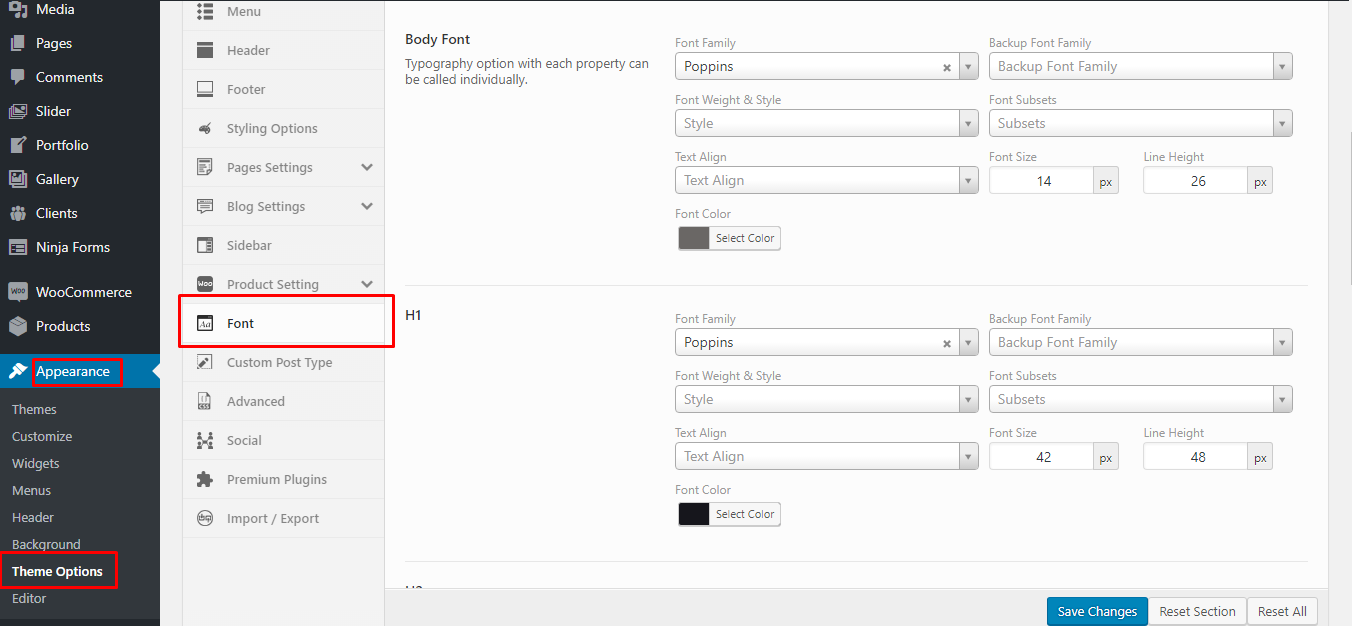
Font Setting: you can easily choose your font, size, font color or style for text body or heading (H1 to H6) at here.
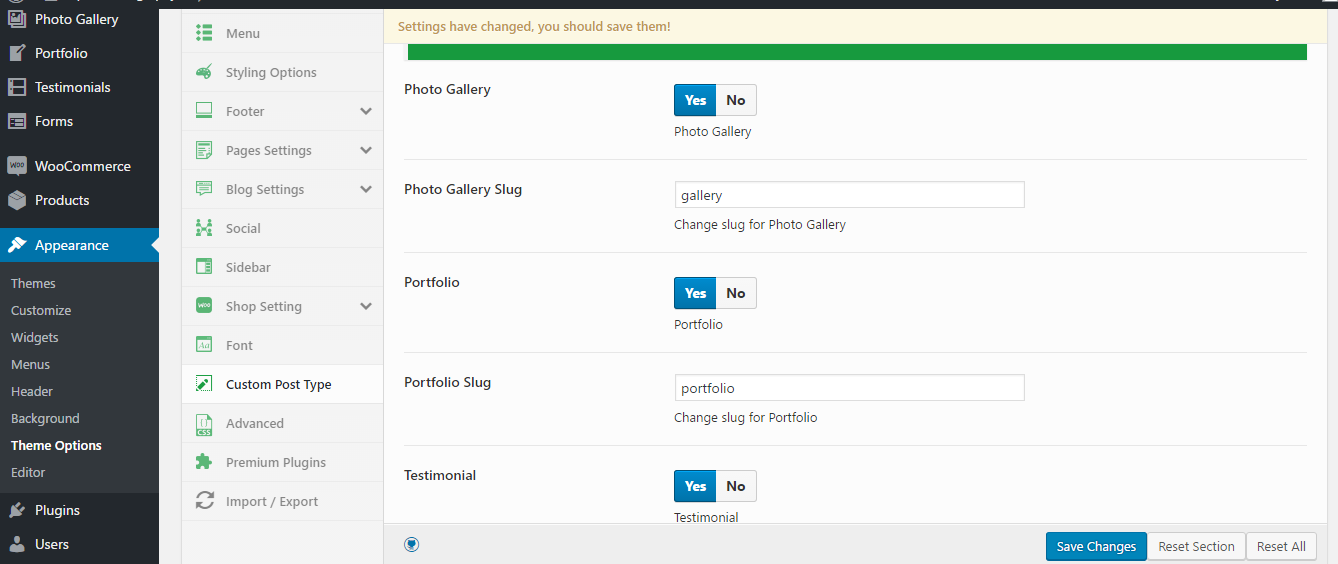
Custom Post Type: you can enable what post types you want and choose slug you want to display when open it. If you do not want to use any of these Types, you can disable it.
Advanced: For higher level, you can add some CSS or JS to your theme which will make it more attractive. Also in this Import Demo section, you can import what data you want to use such as media, icon, slider, content, form, menu, widget or option.
Premium Plugins: Revolution Slider & Visual Composer, with these extra premium plugins, you will have more elements to add in your building theme. Also, you can purchase other plugins from other authors to be supported more options for your theme.

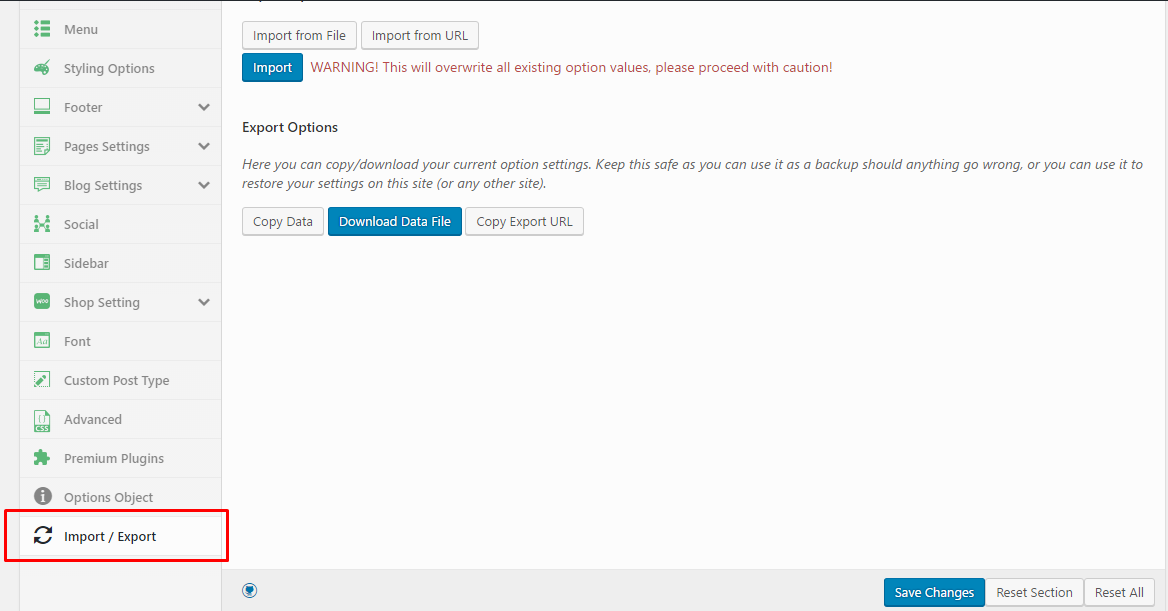
Import / Export: at here you can import more options you want or export current options to keep safe as you can use it as a backup should anything go wrong, or you can use it to restore your setting on this site (or any other site).